Tuesday, June 28, 2011
Dirty Duo meets TuTu Trouble
So I've been absent for a while, but things are happening. I promise. Recently, I made some TuTu's for a race. I know it sounds crazy, I'll explain. I also made some sweet shirts for the same race. I've started working on a bedroom re-do that I promise to share as it progresses (it's moving slowly) and I've been rehearsing for Cinderella. Way more fun than I have time to have. :-)
The tu-tu's I made following a similar pattern to this one. Except I was lazy and just tied knots in the elastic. However they were awesome. As you can see it the following pics. As you look at the pictures, also notice the shirts. It's just some sequins and fabric paint, but I think they really speak about our team goals. My good friend Becky and I decided to enter a race called the Dirty Duo. It was way more fun that I can handle (literally, since I've spent the past 2 days walking like an 85 year old). Part of the fun is the costume contest so of course we went all out. Our team name was "TuTu Trouble" and boy did we have fun.
The race consists of six miles, half of which you run and the other half bike. At each mile marker there is a challenge/obstacle course that you have to complete before you can continue on with the next mile. At the end, you and your partner have to be together and crawl through 40 feet of mud to finish the race. And boy did we get muddy. Becky and I had so much fun. And as a bonus, we got 5th in our age group. It took us 56:51.6 to finish the race, and we are already planning our costumes and strategy for next year.
Team 163 aka TuTu Trouble definitely brought it this year. Watch out Dirty Duo 2012, we'll be back for you.
Thursday, June 9, 2011
Holders for whatever my little heart desires...
So, I was over at A Diamond in the Stuff (who is celebrating 1,000 followers today) and I saw these cute Wooden Pedestals she created. Instantly, I thought, this I could make, and I set out to find similar items at the local thrift stores.
I ended up finding these glass candle sticks and bowls. I had no luck with wood, but these will work just as well. While I was there I also found some hideous bronze candle sticks that had a great shape to them. I didn't take a before picture of them, but come on, you all know what I'm talking about.
First I started out by washing everything I purchased, and then I busted out the Gorilla Glue. If you've never used it, it's amazing! Seriously.
First I moistened the plate and the rim of the candle stick, then I applied a thin ring of the glue around the candlestick. You have to be careful, because the glue expands, so don't apply to much. Then you place them together, and let set. I put a heavy book on top of mine to prevent them from sliding around while the glue set.
After letting the glue dry, I then primed the whole she-bang, and painted. Since I made two of these, I painted one a great aqua blue and the other a champagne gold. I also painted the two bronze candlesticks with the champagne gold as well. Finally I ended up with these and personally, I think they're great.
The blue one matches the towels in the bathroom, so I've placed there to be a catchall for my jewelry. .These are the pieces I tend to wear the most, so it's nice to have them nicely placed, versus them haphazardly thrown across the counter. The champagne gold one with the matching candlesticks are the new table decoration in the dining room. I haven't quite figured out what to put in them, but when I do, I'm sure it will look great.
I ended up finding these glass candle sticks and bowls. I had no luck with wood, but these will work just as well. While I was there I also found some hideous bronze candle sticks that had a great shape to them. I didn't take a before picture of them, but come on, you all know what I'm talking about.
First I started out by washing everything I purchased, and then I busted out the Gorilla Glue. If you've never used it, it's amazing! Seriously.
First I moistened the plate and the rim of the candle stick, then I applied a thin ring of the glue around the candlestick. You have to be careful, because the glue expands, so don't apply to much. Then you place them together, and let set. I put a heavy book on top of mine to prevent them from sliding around while the glue set.
After letting the glue dry, I then primed the whole she-bang, and painted. Since I made two of these, I painted one a great aqua blue and the other a champagne gold. I also painted the two bronze candlesticks with the champagne gold as well. Finally I ended up with these and personally, I think they're great.
The blue one matches the towels in the bathroom, so I've placed there to be a catchall for my jewelry. .These are the pieces I tend to wear the most, so it's nice to have them nicely placed, versus them haphazardly thrown across the counter. The champagne gold one with the matching candlesticks are the new table decoration in the dining room. I haven't quite figured out what to put in them, but when I do, I'm sure it will look great.
Wednesday, June 8, 2011
Win a Trip to Paris....who wouldn't want that?
So the lovely Jordan at Oh Happy Day is hosting a trip to Paris give-away. Go visit her and enter here! Who wouldn't want to go to Paris! I've been lucky enough to visit once before, but there was so much I missed. I'd love to go back and experience even more.
I leave you with a few pics from my brief time there.
Friday, May 13, 2011
Didn't work out the way I thought...
Do you ever have one of those projects, where you spend a lot of time planning it and figuring out kinks, and cutting out things, and once you put it all together, it is a complete an utter epic fail? That happened to me this week. The good news is, I was able to re-think the project, and make it work out, but in a slightly different way.
So, the guy in my life, J, is super-obsessed with maps. Seriously. Those of you who know him can confirm this. The good news is maps look fun framed. I've been know to exasperate this by gifting him several antique framed maps over the many, many years I've know him. Well since he spends alot of time at my house, I'm trying to incorporate him more into the decorations. He calls my house to girly, but I'd like to state, at least I have no pink walls. I could see doing a purple room....but I digress.
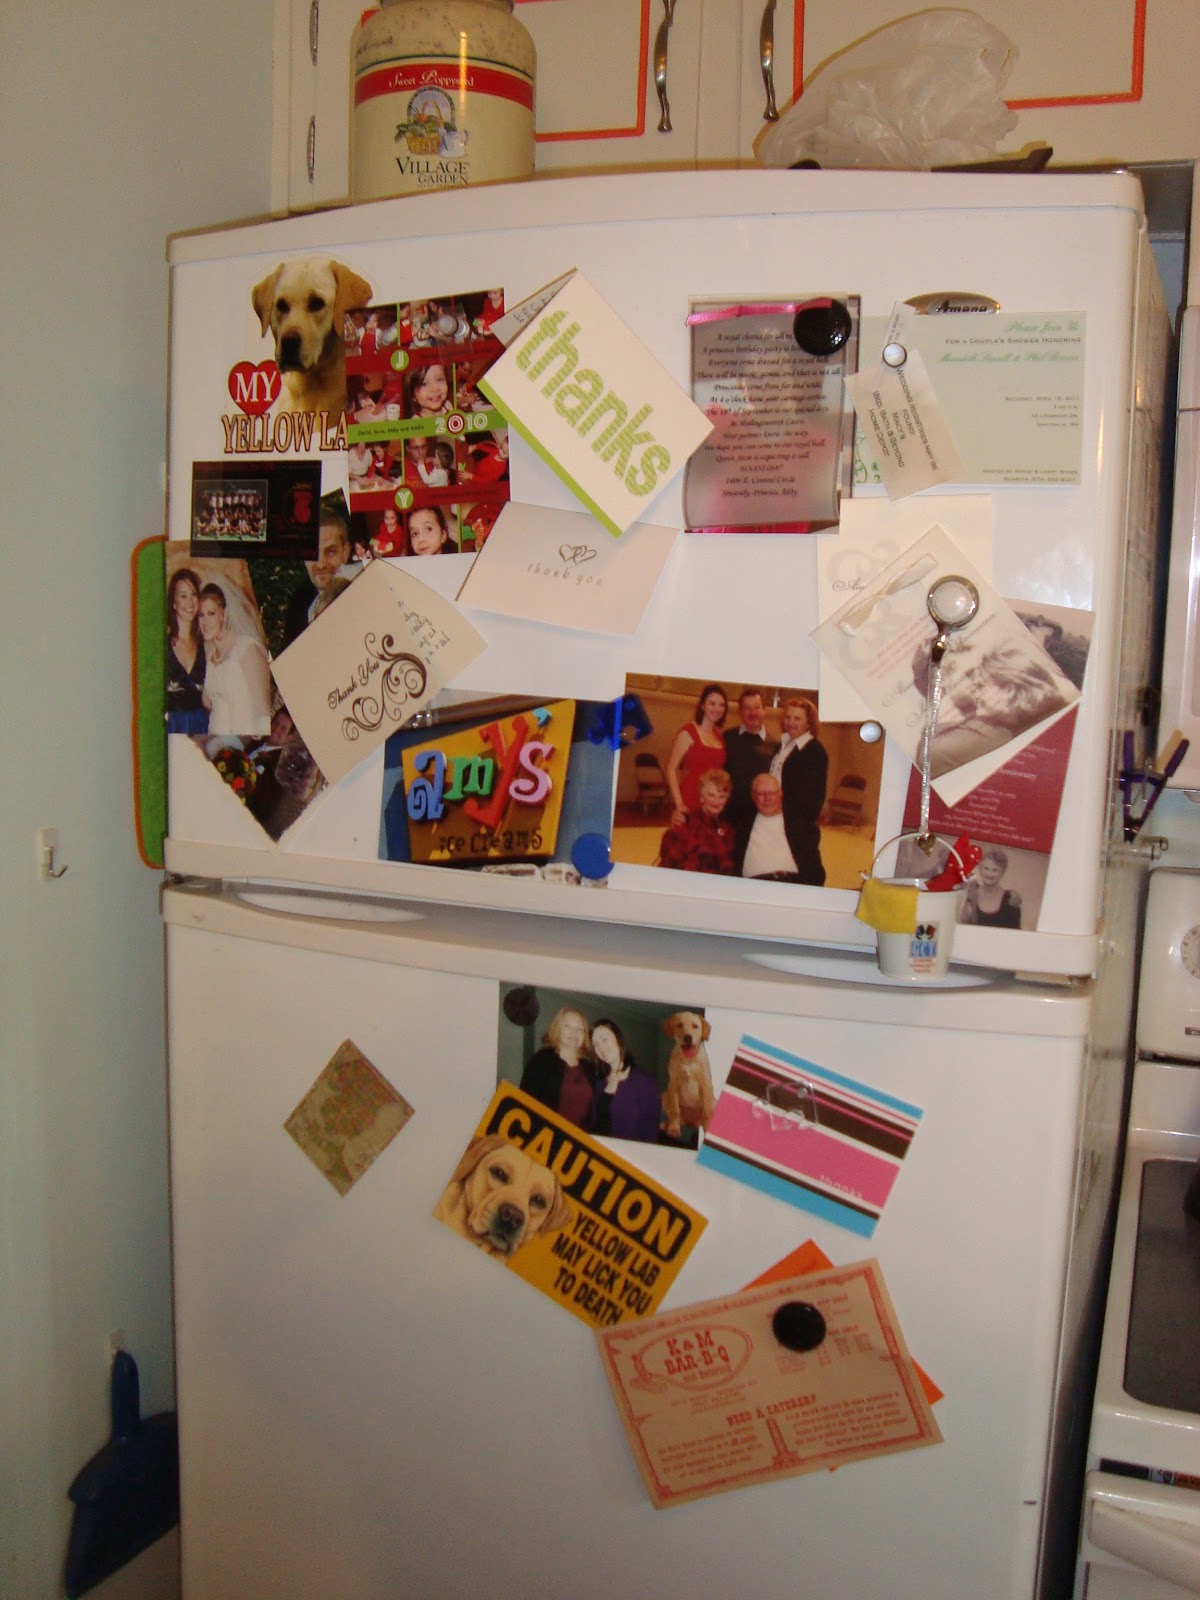
So I got really excited to do this project. You see I'd be complaining about not havingany enough magnets for the fridge, for quite a while.
So, anyways, in order to incorporate J's love of maps, I got online and found copy of the 1895 World Atlas, with state breakdowns. I printed them out on cardstock (originally) and printed and cut them out. If anyone is interested in having the printable version here.
Then I thought it would be great to give them a little more depth, so I took some foam board, traced each individual map, and cut them out.
As you can see, I had a special helper, who would not leave me ALONE! He's lucky he's cute. That's all I have to say. There was something about the texture he loved. I numbered each piece with it's corresponding map and then sprayed the edges with some leftover spray paint.
Since J was taking the pictures, you also ended up with this....
Nice huh? Anyways, after doing all that, I then let them dry. The next day, I tested one map. I glued it onto it's corresponding foam board. Since I wasn't happy with the sides, I then wrapped them in very thin brown ribbon. I then sprayed the gloss protective spray over the whole piece, and it FAILED! The map didn't stick to the foam board anymore, it shriveled up, got crinkly, and I got very frustrated. I tried a few more, and gave up. I didn't even take pictures because I hated them. It was awful, so I regrouped. Fortunately, I had bought the Avery Magnet Sheets so I reprinted the maps on them. And cut them out, again. I then sprayed those with two coats of the protective gloss coat.
Let them dry and VOILA! My boring over cluttered fridge went from blah to this....
I'm sure when J finally sees them, I'll get in trouble for the states not being size-proportinate to each other, and then he'll rearrange them to some complicated system, like population of 1895, that I don't understand. But the point is, maps make him happy, and more magnets for me make me happy. So we're all happy.
So, the guy in my life, J, is super-obsessed with maps. Seriously. Those of you who know him can confirm this. The good news is maps look fun framed. I've been know to exasperate this by gifting him several antique framed maps over the many, many years I've know him. Well since he spends alot of time at my house, I'm trying to incorporate him more into the decorations. He calls my house to girly, but I'd like to state, at least I have no pink walls. I could see doing a purple room....but I digress.
So I got really excited to do this project. You see I'd be complaining about not having
| As you can see, yes I am that person with I <3 my yellow lab magnets. I blame my mother! Love you mom! |
Then I thought it would be great to give them a little more depth, so I took some foam board, traced each individual map, and cut them out.
As you can see, I had a special helper, who would not leave me ALONE! He's lucky he's cute. That's all I have to say. There was something about the texture he loved. I numbered each piece with it's corresponding map and then sprayed the edges with some leftover spray paint.
Since J was taking the pictures, you also ended up with this....
Nice huh? Anyways, after doing all that, I then let them dry. The next day, I tested one map. I glued it onto it's corresponding foam board. Since I wasn't happy with the sides, I then wrapped them in very thin brown ribbon. I then sprayed the gloss protective spray over the whole piece, and it FAILED! The map didn't stick to the foam board anymore, it shriveled up, got crinkly, and I got very frustrated. I tried a few more, and gave up. I didn't even take pictures because I hated them. It was awful, so I regrouped. Fortunately, I had bought the Avery Magnet Sheets so I reprinted the maps on them. And cut them out, again. I then sprayed those with two coats of the protective gloss coat.
Let them dry and VOILA! My boring over cluttered fridge went from blah to this....
I'm sure when J finally sees them, I'll get in trouble for the states not being size-proportinate to each other, and then he'll rearrange them to some complicated system, like population of 1895, that I don't understand. But the point is, maps make him happy, and more magnets for me make me happy. So we're all happy.
Tuesday, May 10, 2011
Baggo Bags
Summer is fast approaching. With summer comes BBQs and outdoor games. One of the games everyone loves is Baggo. Don't know what Baggo is, you so need to play. Also for some reason I can't figure out, some people call it 'Cornhole' which I think is kind of creepy. Anywho...for Christmas, two of my favorite people got a Baggo set (homemade by their brother). Super cool! However, he didn't make any bean bags for them. This is where I come in.
So I began with fabric in two different colors/patterns. First I flipped the fabric inside out, and traced four 6 and a 1/2 inch squares on the fabric.
I then cut out my squares...
And ended with 8 squares. The advantage of cutting them together like this is that you get perfectly matched pieces.
Now all I have to do is sew them together. I used a straight stitch, with the stitches spaced as close as possible. I also left a hole to flip the bag right side out, and to put the beans in.
After all the sides were sewn together, I clipped the outside seams so that the bag would lay flat and have more give when it was flipped inside out.
Then you flip the bag right-side out, and voila, a perfect 6-inch bag. It is now time to fill with the beans. It took me around 2 cups of beans per bag. I rolled up a sheet of paper, and placed it in the opening to use as a funnel.
After pouring all the beans in each bag, the last thing to do was hand-sew the openings shut.
Repeat on each bag, and finally you have 8 bean-bags, in two colors, ready to be tossed in the backyard all summer. I'd say this project took me around a half-hour to do. So simple!
Hilary, Mariah I hope you enjoy them! As always, thanks for stopping by.
So I began with fabric in two different colors/patterns. First I flipped the fabric inside out, and traced four 6 and a 1/2 inch squares on the fabric.
I then cut out my squares...
And ended with 8 squares. The advantage of cutting them together like this is that you get perfectly matched pieces.
Now all I have to do is sew them together. I used a straight stitch, with the stitches spaced as close as possible. I also left a hole to flip the bag right side out, and to put the beans in.
After all the sides were sewn together, I clipped the outside seams so that the bag would lay flat and have more give when it was flipped inside out.
Then you flip the bag right-side out, and voila, a perfect 6-inch bag. It is now time to fill with the beans. It took me around 2 cups of beans per bag. I rolled up a sheet of paper, and placed it in the opening to use as a funnel.
After pouring all the beans in each bag, the last thing to do was hand-sew the openings shut.
Repeat on each bag, and finally you have 8 bean-bags, in two colors, ready to be tossed in the backyard all summer. I'd say this project took me around a half-hour to do. So simple!
Hilary, Mariah I hope you enjoy them! As always, thanks for stopping by.
Monday, May 9, 2011
Bookcase Curtains
I have this wonderful bookcase in my kitchen. My Father got it for me. It has wonderful deep shelves (which come in handy when, I have 2 giant, rambunctious dogs). However, I've noticed that the bottom 2 shelves have quickly become a catchall for random kitchen items. See below....
Notice the dog head in the picture. He's one of the reasons I have clutter in the bottom shelves. If you look closely, you'll see tennis balls and dog toys on the shelf. :-) So while I like the arrangement of the top two shelves the bottom two are ick.... here is a closer look..
So I bought myself, some cute fabric and some tension rods, and went to work. I picked a fabric that is very similar to my wall color plus it has the added bonus of a print that matches decoration colors. Yay!
After measuring the shelf openings, I cut two panels, and got to work sewing. I'm assuming everyone knows how easy it is to make curtain panels so I'm not going to give detailed instructions. On the two short sides I sewed a rolled hem.
I then sewed the bottom with a wider hem.
After sewing a rod pocket at the top (I forgot to take a picture, sorry) I hung the curtains and it looks like this...
All the junk is hidden, and I'm very pleased. As always thanks for stopping by.
Notice the dog head in the picture. He's one of the reasons I have clutter in the bottom shelves. If you look closely, you'll see tennis balls and dog toys on the shelf. :-) So while I like the arrangement of the top two shelves the bottom two are ick.... here is a closer look..
So I bought myself, some cute fabric and some tension rods, and went to work. I picked a fabric that is very similar to my wall color plus it has the added bonus of a print that matches decoration colors. Yay!
After measuring the shelf openings, I cut two panels, and got to work sewing. I'm assuming everyone knows how easy it is to make curtain panels so I'm not going to give detailed instructions. On the two short sides I sewed a rolled hem.
I then sewed the bottom with a wider hem.
After sewing a rod pocket at the top (I forgot to take a picture, sorry) I hung the curtains and it looks like this...
All the junk is hidden, and I'm very pleased. As always thanks for stopping by.
Monday, April 25, 2011
Lovely Lace Flower
My cousin Meredith is getting married in June, so of course we had to have a pre-wedding party (ok, really it was a shower). In my family, a wedding, is a big deal. The Sewell clan loves a reason to have a party, any reason. Really, we just love being together, and anyway we can be together ususally turns into a party. Two weekends ago, my Aunt Lorry, threw a couples shower for Meredith and Phil. After purchasing my gift, I went home and didn't think much about it, until the night before the party. It was 9p.m., and I needed to wrap that present. So I went searching for wrapping paper. In the closet I had Christmas, Birthday, Graduation papers. None of those will work. So I started prowling my house, trying to be clever.
In my house, I like to paint walls.(There is a point to the rabbit trail, I promise!) Alot! I've owned my house a little less than 2 years, and painted the basement 3 times (thankfully, I've settled on colors I like, I don't see repainting it in the near future any time soon). When it comes to painting my Father is a stickler for details and edges, and he instilled this in me, to an extent. One thing that I use while painting is the brown craft paper on rolls, that you use to make clean edges and protect the floor. I think you can see where this is going....I wrapped the gift with that brown paper.
But it wasn't enough, so I dug through my craft tub, and came up with a spool of wide ribbon in chocolate brown. After wrapping it around the package, it still looked kind of plain. So, while digging through the craft box some more, I came across some white lace scraps, and white felt.
After seeing this, an idea popped into my head. Since the white was too harsh against the brown, I brewed up a strong pot of tea, and let the pieces soak for about an hour.
After letting them soak, I pulled them out, wrung them out. The problem with felt is it holds alot of moisture. So I put each piece in between two pieces of paper towels, and rolled them up as tight as possible. This helps get moisture out.
I did this with the lace as well. I then popped them into the dryer for about 30 minutes. Now they are a lovely light tan, kind of antique-y looking.
After they were dried, I traced out some flowers and got to work. I traced out one extra big flower, folded the felt in 1/2 and cut out 2 flowers at once.
I tried my best to cut inside the traced lines so that they didn't show on the finished product. On the second sheet, I traced out 6 flowers of the same size and cut them all out. This actually turned out to be one more flower than I needed, so really you need 5 flowers. I also cut out one flower, same shape, but significantly smaller.
I then traced two flowers onto the lace. This was a little difficult, but I found using pencil, with a piece of paper underneath allowed me to see the marks.
After getting all my pieces cut out I was ready to assemble the flower.
First I took my two large flowers, and placed it so the petals could all be seen. I then layered four scrap pieces of lace, and one mid-size flower.
I put a few stitches in the middle, and then began layering in the fun petals. First you take one mid-size petal and fold it in half...
Then you fold it in half again, so you end up with this.
Then you stitch it on, so that you end up with four all the way around.
After doing this, do the same with the lace flowers and layer them in.
Finally, add in the smallest flower and your pearls.
And your done. I chose to hot glue a pin clip to the back of mine. This will allow Meredith to re-use the flower as much as she wants. I actually loved it so much, that I made a second one for me. I wore it in my hair on Easter Sunday.
As always, thanks for stopping by.
In my house, I like to paint walls.(There is a point to the rabbit trail, I promise!) Alot! I've owned my house a little less than 2 years, and painted the basement 3 times (thankfully, I've settled on colors I like, I don't see repainting it in the near future any time soon). When it comes to painting my Father is a stickler for details and edges, and he instilled this in me, to an extent. One thing that I use while painting is the brown craft paper on rolls, that you use to make clean edges and protect the floor. I think you can see where this is going....I wrapped the gift with that brown paper.
But it wasn't enough, so I dug through my craft tub, and came up with a spool of wide ribbon in chocolate brown. After wrapping it around the package, it still looked kind of plain. So, while digging through the craft box some more, I came across some white lace scraps, and white felt.
After seeing this, an idea popped into my head. Since the white was too harsh against the brown, I brewed up a strong pot of tea, and let the pieces soak for about an hour.
After letting them soak, I pulled them out, wrung them out. The problem with felt is it holds alot of moisture. So I put each piece in between two pieces of paper towels, and rolled them up as tight as possible. This helps get moisture out.
I did this with the lace as well. I then popped them into the dryer for about 30 minutes. Now they are a lovely light tan, kind of antique-y looking.
After they were dried, I traced out some flowers and got to work. I traced out one extra big flower, folded the felt in 1/2 and cut out 2 flowers at once.
I tried my best to cut inside the traced lines so that they didn't show on the finished product. On the second sheet, I traced out 6 flowers of the same size and cut them all out. This actually turned out to be one more flower than I needed, so really you need 5 flowers. I also cut out one flower, same shape, but significantly smaller.
I then traced two flowers onto the lace. This was a little difficult, but I found using pencil, with a piece of paper underneath allowed me to see the marks.
After getting all my pieces cut out I was ready to assemble the flower.
First I took my two large flowers, and placed it so the petals could all be seen. I then layered four scrap pieces of lace, and one mid-size flower.
I put a few stitches in the middle, and then began layering in the fun petals. First you take one mid-size petal and fold it in half...
Then you fold it in half again, so you end up with this.
Then you stitch it on, so that you end up with four all the way around.
After doing this, do the same with the lace flowers and layer them in.
Finally, add in the smallest flower and your pearls.
And your done. I chose to hot glue a pin clip to the back of mine. This will allow Meredith to re-use the flower as much as she wants. I actually loved it so much, that I made a second one for me. I wore it in my hair on Easter Sunday.
As always, thanks for stopping by.
Subscribe to:
Posts (Atom)